All tags
5 star recipes
A
air fry
alcohol beverages
Beverages
BREADS
Breakfast
cakes
Candy
Casseroles
charcuterie boards
Chicken
chili
Chinese
Chowder
Christmas
coffee cakes
Conversion Chart
cookies
dale.
DESSERTS
DIPS
easter
fish
Freezer Meals
Friends
Halloween
herbs/spices
jan's canning
jan's ice cream
meat
Mexican
MISC
Muffins
new years
pasta
Pastry
Pies
polish
Potatoes
potpourri
pressure canner
QUICK BREADS
Rice
Salad Dressings
SALADS
sandwich spreads
Sandwiches
Seafood
Skillet
SNACKS
Soup
st. patrick
Stews
summer
t
Thanksgiving
Vegetables
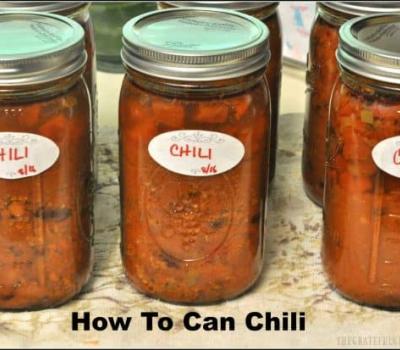
How To Can Chili
Learn how to can chili (meat and beans) using safe pressure canning guidelines. Recipe yields 8 qts. of old-fashioned chili, for long term storage.\]
Author: JB @ The Grateful Girl Cooks!
Ingredients
3 pounds ground beef2 medium onions , diced
1 large green bell pepper , diced
56 ounces canned diced tomatoes (including juice)
31 ounces canned kidney beans, drained
31 ounces canned chili beans (including liquid)
31 ounces canned black beans, drained
15.5 ounces canned pinto beans, drained
Water (use 3½ large 28 ounce cans of water - use empty diced tomato cans)
3 teaspoons dried oregano
2 Tablespoons cumin
4-5 teaspoons salt
3 teaspoons paprika
1½ Tablespoons garlic powder
1½ teaspoons cayenne pepper
8 Tablespoons chili powder
5 Tablespoons Worcestershire sauce
Additional salt to taste (if necessary)
Instructions
While cooking chili, prepare your pressure canner, with 3" of simmering water. Prep jars and lids according to safe USDA canning guidelines.Brown ground beef, diced onions and diced green pepper in a large pan until fully cooked. Drain grease and discard. Transfer meat mixture to a very large stockpot.
Add canned diced tomatoes, kidney beans, chili beans, pinto beans, and black beans to meat mixture. Stir. Add water,spices and Worcestershire sauce. Stir all ingredients well to combine. Cook chili on medium-high until it begins boiling. Give it a taste, and adjust salt, if necessary.
Fill prepared (clean & hot) canning jars with hot chili, leaving a 1" headspace in each jar. Remove air bubbles with utensil, and adjust headspace, if necessary. Wipe jar rims clean with a wet dishcloth, to ensure a good seal. Center flat lids on top and screw down rings until fingertip tight. Process quart jars at 10# pressure for 90 minutes. If using pint jars, process at 10# pressure for 75 minutes.
Once processing time is completed, let pressure drop to zero naturally, then follow instructions for safely removing vent and lid. PLEASE follow your pressure canners manufacturer instructions!
Remove HOT jars of chili, place onto a dish towel on counter (don't place jars directly on counter as temperature variations could lead to cracking the jars). Let jars sit and cool undisturbed overnight. Once completely cooled, check to ensure each jar is properly sealed, wipe down jars, label each one, and store in pantry!